
Enslavers Redux Gameplay Guide/Episode I Strategy Guide
Campaign Overview
Story Prologue: This episode focuses on the Terrans, specifically, the Dominion in the early days after it was formed when the Overmind's Zerg was busy fighting the Protoss on Aiur. Jim Raynor is not to be seen here as his new rebel group - Raynor's Raiders, formed he stole the Hyperion from Mengsk's shipyard, made a run to Char in an attempt to rescue Sarah Kerrigan after he heard her psionic distress calls. His friend and former Commander of the Sons of Korhal, who also left Mengsk just before the Dominion was formed, disagreed with Raynor's decision to go to Char, believing it to be a fools errand based on his admiration for his former lover, Sarah Kerrigan. The Commander knew better - she was infested, and this was a trap. But he also knew trying to convince Raynor out of his mind once a decision was made was impossible. So they went their separate ways. But unfortunately for him, the Commander was soon captured by the Dominion. Mengsk gave the Commander two choices, public execution for a traitor, or serve him once again as Commander of his Dominion Alpha Squadron...
The Terran campaign is set during the lull surrounding the Dominion while the Overmind was busy on Aiur between Starcraft Episode II (Overmind) and Episode III (The Fall). As such, the UED has not yet arrived but the fall of the Confederacy and the rise of the Zerg infestation has alerted them to form an expedition fleet to begin travel to the Koprulu sector. So no UED Valkyrie's can be built yet but Koprulu medics are allowed (only can heal).
Hero Overview
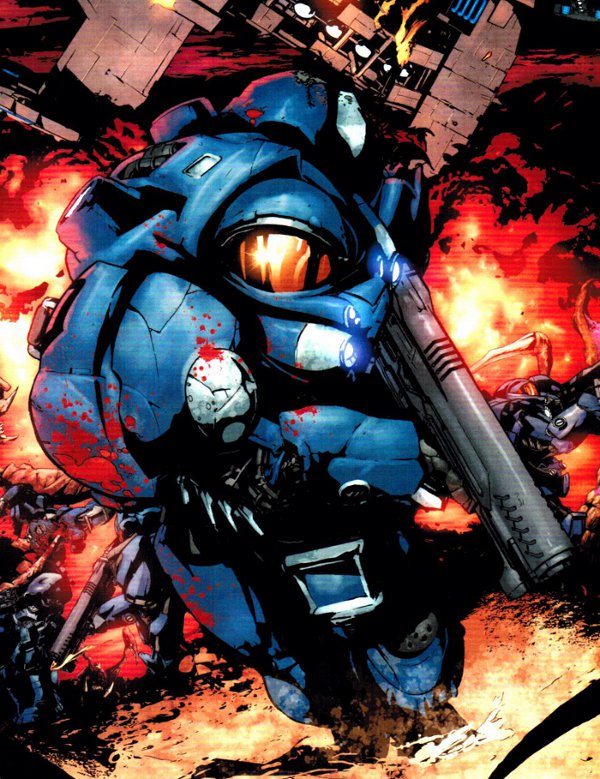
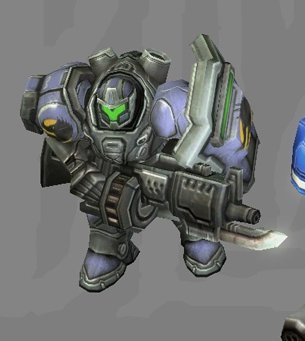
The Commander

Description - The Commander leads the Dominion's Alpha Squadron. He has great tactical sense and impressive combat abilities. Can attack ground and air units. Expert weapons specialist
Armament: CMC-300/400 Powered Combat Suit / 8mm AGR-14 "Impaler" Gauss Rifle
Early during the Zerg invasion of the Koprulu sector, the Commander held the rank of Magistrate in the Confederacy, assigned to help defend Mar Sara and prevent panic. While relocating colonists, he was joined by ex-Confederate Marshall Jim Raynor. Together, they become disillusioned with the Confederacy and joined Arcturus Mengsk and the Son’s of Korhal to lead a revolution against the Confederacy. That alliance came to an end when Mengsk betrayed his own team on Tarsonis and left his most trusted lieutenant, Sarah Kerrigan, to the zerg. The Commander helped Raynor escape from Mengsk’s newly founded Dominion fleet and briefly joined him and his newly formed Raynor’s Raiderrs. However, the Commander left the Raiders when he believed going to Char, after receiving a psionic message from Kerrigan, was a merely a suicide trap with Raynor blinded by his feelings.
The Commander returned to Dominion space and was taken prisoner by self-crowned Emperor Mengsk. Instead of a public execution, Mengsk realized his talents should not be wasted and he was reinstated as Commander to the Dominion’s Alpha Squadron. Although distrustful of each other, the Commander is a loyal soldier and follows orders as demanded. A weapons and tactician expert, the Commander is both respected and feared by all in the Dominion. Few know his real name and even fewer dare to ask.
The Commander is a hero that is based on an elite marine. He is capable of attacking both ground and air units alike in short quick bursts of fast but low damaging attacks. Compared to Zeratul and Kerrigan, The Commander is the most fragile hero to start out with so it is highly recommended to keep him in the back row with medics supporting him at all times until he has been upgraded enough to be self-sufficient. His abilities allow him to become quite difficult to take down once fully upgraded, especially when supported by medics. The Commander has no easy means of escape, however, so be careful of being gained up by enemies.
The Commander, with the exception of Combat Shield and the Lazarus Protocol, can only improve his skill-sets and add new abilities by finding rare materials known as Palladium and Iridium throughout the Terran campaign. There are several of these items hidden throughout. When at least 5 of each have been found, the Commander will gain a "level" in each, and gain a bonus in Defense for Palladium or Offense for Iridium. When enough of both have been found, new upgrades for his abilities will be unlocked at the Black Market Compound. In order to acquire new abilities, the Commander must also find different weapons and equipment scattered around the Terran campaign. Some of these items are only found once in a single mission, others may be found multiple times. It is highly recommended you do not complete a mission without ensuring you have searched the area thoroughly.
Starting Stats -
- Health - 300 (+50 for every 5 Palladium found)
- Health Regeneration - 0 (+1/2 health regeneration in 10/5 seconds after last damage, at 15/20/25 Palladium found)
- Armor - 1 (+1 for every 5 Palladium found)
- Movement Speed - 2.25 meters per second (+10% increase once at 10 Palladium found)
- Attack Damage - 16 (+1 for every 5 Iridium found)
- Attack Bonus - 0 (+2 extra damage to biological/mechanical/massive type units at 15/20/25 Iridium found)
- Attack Range - 5 (+1 once at 10 Iridium found)
- Attack Speed - .70 per second (+5% for every 5 Iridium found)
Max Palladium/Iridium To Be Found:
Mission1: 5/5 (+5/+5)
Mission2: 8/8 (+3/+3)
Mission3: 15/13 (+7/+5)
Mission4/b: 21/20 (+6/+7)
Mission5: 25/26 (+4/+6)
Mission6: 30/30 (+5/+4)
Iridium upgrades generally improves offensive capabilities of the Commander while Palladium upgrades generally improves defensive capabilities. Total enhancements provide:
Iridium Level 1/2/3/4/5/Master:
- +5/10/15/20/25/30% attack speed bonus
- +1/2/3/4/5/6 damage
- +1 weapon range (Level 2+)
- +2 extra damage to biological/mechanical/massive type units (3/4/5+)
- +10% chance to briefly stun enemy unit on each attack (Master level only)
Palladium Level 1/2/3/4/5/Master:
- +50/100/150/200/250/300 health
- +1/2/3/4/5/6 armor
- +10% movement speed (Level2+)
- +1/2 health regeneration after last damage in 10/5 seconds (Level3/4/5+)
- + Kinetic Barrier ability (Master level only)
Abilities -
Flashbang Grenades (Initial, Upgradable per mission at Black Market Compound)
- Description: Stuns a group of enemies for 3 seconds. Certain massive units take 1.5 seconds
- Upgrade: Palladium Needed: 3 | Iridium Needed: 3
- Strategy: Your initial starting ability. This is your main crowd control power. In a small but decent sized area, you can stun both ground and air units alike for 3 seconds. This is critical to either destroying them in that time or escaping from them. As another bonus, this effect not only disables the victim's ability to detect cloaked units such as ghosts or wraiths, but can actually reveal enemy cloaked units! This becomes very helpful as you will face many wraiths in this campaign. When upgraded, the area significantly becomes larger allowing you to stun just about any army the enemy sends at you and the stun goes to 5 seconds. Keep in mind your more massive units such as Battlecruisers, Ultralisks, Carriers, Archons, will only take 1.5 second stuns, and as such, be prepared to fight them much faster than other enemies.
(Passive) Combat Shield (Purchased per mission at Black Market Compound)
- Description: Provides a 50% chance to block a ranged attack. Will not block melee or spell damage.
- Upgrade: N/A
- Strategy: This ability should almost always be purchased first when you build a BMC. With it, you effectively negate 50% of enemy ranged fire. You can plop down the Commander in the middle of a firefight with marines or dragoons or hydralisks and he'll survive quite well against them. Too many of course focus firing on him and he'll still be in trouble. This has no effect against melee or spells, so he's in major trouble against enemies such as mass zerglings, ultralisks, zealots, psionic storms, yamato cannon blasts, splash siege arclite attacks, etc.
Pulse Grenades (Found, Upgradeable per mission at Black Market Compound)
- Description: Deals 50 damage at a group of enemies at the cost of 50 life. Will deal 100 damage towards biological and psionic units.
- Upgrade: Palladium Needed: 8 | Iridium Needed: 10
- Strategy: You can find this ability in Terran01 and most missions if you miss it, as it becomes more and more hard to miss as you continue the Terran campaign. Essentially think of this ability as a stim grenade. The damage you deal towards enemies is dealt back to you. Of course, you deal much more damage due to the fact you are dealing it in an area of effect. In addition, biological and psionic enemies take double damage. This means, un-upgraded, enemy clusters of marines, firebats, ghosts, medics, workers, zerglings, and hydralisks can be instantly killed while others would be severely wounded. Vehicles and air units are still damaged but only by 50 points. Once upgraded, this jumps to 100 base damage and 200 bonus damage, which means now zealots, high templar, dark templar, and lurkers can be insta-killed. The rest are again significantly wounded. Keep in mind again, you now take 100 points of damage, so keep medics on hand or heal yourself quickly.
Hellfire Blast (Found, Upgradeable per mission at Black Market Compound)
- Description: Deals 100 damage at a single target. Will deal 250 damage at a mechanical unit or structure. Has a low cooldown but only 5 charges can be carried at once. Will refresh a charge once every 120 seconds.
- Upgrade: Palladium Needed: 15 | Iridium Needed: 14
- Strategy: Found in Terran02, and a few more missions afterwards if missed, this ability fires a single blast towards a single unit, but its a powerful blast. Unlike your first two grenade abilities which are unlimited with an average cooldown, this ability has charges and a very low cooldown. Only 5 charges can be carried at once, so you can fire off this blast 5 times quickly, but then you will be depleted. You automatically recharge this ability once per 2 minutes, so feel free to let a blast go once you've reached 5 charges, unless you wish to save all 5 up for an assault. Initially, you can only one-shot minor structures like missile turrets or mechanical units like dragoons or siege tanks and goliaths, but once upgraded, you can one-shot more critical structures like bunkers and sunken colonies, and severely weaken massive units like battlecruisers.
Turbo Jumpack/Rangefinder Oculus (Found. Variant depends on plot canon)
- Description (Jumpack) - Allows the Commander to jump up and down non-steep cliffs. Also increases movement speed by roughly 30%.
- Upgrade: N/A
- Strategy: This passive ability is found only in Terran04a and is the converse replacement for the Oculus if doing A canon. It allows the Commander to become a SC2 reaper and jump up and down cliffs, which allows him to do hit and run tactics or save him from impending death. The bonus movement speed is also a nice touch for assaults or escapes. Still, this isn't a blink ability, and if you become surrounded, you must fight your way out, so be careful.
- Description (Oculus) - Allows the Commander to detect cloaked or burrowed units. Also increases sight by 2 and weapon range by 1.
- Upgrade: N/A
- Strategy: This passive ability is found only in Terran04b and is the converse replacement for the Jumpack if doing B canon. It essentially allows the Commander to become a mobile detector. While there are no Dark Templar you will fight against the Conclave's Protoss on Aiur, there are still several cloaked wraiths and ghosts from Schezar's forces and burrowed zerg you will deal with. (you will deal with more in his Epilogue mission however) More importantly, this boosts the Commander's sight and weapon range, giving him the ability to attack from a better distance than his A-canon counterpart. If you've upgraded his weapon via Iridium, you will be able to gain a range in B canon of 7, +1 higher than standard marines with their range upgrade or an A-canon Commander.
Chronorift Device/Stim Infusion (Found. Variant depends on plot canon)
- Description (Chronorift) - Slows movement and attack speeds of all units, allies and enemies alike, in an area
- Upgrade: N/A
- Strategy: You might remember this ability from WOL on the device Raynor found from Mengsk's research station, from stolen Protoss tech. Well...here is is, now for the Commander's use. You can find this ability in Terran05a only, and it works wonders to stop enemy waves from attacking a Nexus point. It also does a great job against impending Torrasque attacks in Terran06a. Be warned that it also affects your own units, so be sure you attack outside of the area of effect when using it. If you and the enemies are mixed in together, you may not want to deploy it. Additionally, any enemies that survive your chrono trap can be stunned with a flashbang grenade for double disables, making this a powerful 1-2 punch.
- Description (Stim Infusion) - Greatly boosts the Commander's attack and movement speed as well as healing him over the duration of the effect
- Upgrade: N/A
- Strategy: So the Commander is a marine....marine's like stims...where's his stim!? Well turns out the Commander isn't a fan of drugs and tissue damage so he's against taking them. However, this new compound gives him all the adrenline benefits of increased movement and attack speeds without any side effects of damage towards him. Even better - it actually heals him! So you can use this in 1 of 3 ways - Assault, Escape, or to Heal. Or all three, depending on the situation. The Commander becomes a true battle tank with this ability, but be careful going leroy jenkins with this, he isn't invulnerable.
Lazarus Protocol (Purchased per mission at Black Market Compound)
- Description: Upon death, the Commander becomes incapacitated while rapidly restoring health to 100%. Can be used once every 300 seconds.
- Upgrade: Palladium Needed: 21| Iridium Needed: 22
- Strategy: This is the 2nd ability that can be purchased at the BMC, the other being Combat Shield. However, you must have a high amount of Palladium and Iridium first, and as such, is only available in Terran05 and 06 (A or B canon). While expensive, it is well worth the cost if you plan on sending your Commander into battle without looking at his health. Upon death he will freeze and become invulnerable. Over a brief 20 second period he will rapidly recover health back up to 100%. Once unfrozen, the effect wears off and you have another 5 minutes of vulnerability until it is ready to be used again. Be sure you don't rush into battle again without checking your health, or if alone, run back to your base to ensure the enemy doesn't finish you off. Either way, although this is only able to be purchased late in the game, it is a powerful revive ability, unique against Zeratul or Kerrigan in that the Commander will not "teleport" anywhere, will be fully restored to 100%, and will never run out of times it can be used. Drawbacks are that it must be purchased with requirements, only available late game, and has a relatively long, for being still in the battlefield, 5 minute cooldown.
Kinetic Barrier (Automatically acquired after finding the max 30 Palladium)
- Description: Constructs an energy barrier around the Commander's marine combat suit, negating all damage until the barrier has taken enough damage or the duration has expired. The barrier will also rapidly break down if melee damage is taken.
- Upgrade: N/A
- Strategy: This active ability is received when you have found all 30 Palladium's in the campaign. As if the Commander wasn't a defensive tank at this end-game already, using this gives him his own personal defensive shield for a brief period. One drawback - it will be depleted instantly if a melee unit attacks you. Like Combat Shield, this highlights the fact the Commander does not do well in close combat, so stay away from them Zerglings and Zealots! However, with a full 30 Palladium, full armor upgrades, Lazarus Protocol ready, and this active, the Commander becomes the most defensive hero in this entire custom project, more so than even Zeratul or arguably Kerrigan herself, even though he only has a humble 600 HP, he has a lot of armor to get through first!
Black Market Compound
- Description: Unique Terran structure, that an SCV can build, where the Commander can purchase unique or otherwise illegal weapon and armor upgrades for himself as well as his base. He can also hire elite units to fight for him, if any have been found.
- Strategy: This is a vital structure for the Terran Enslavers Redux campaign. You should aim to build this as soon as you can since it takes about 2 minutes to complete, one of the longest build times for the Terran's. While you can build multiple ones, a single Compound is most likely sufficient. It contains your hero's upgrades as well as upgrades for your base. Upgrades you purchase here, including the ones to The Commander, will not carry over mission to mission, they must be re-purchased, a somewhat downside to being Terran...things cost money. The more Palladium and Iridium you find, the more upgrades unlock for The Commander. Building upgrades are unlocked as you progress through missions. Finally, if you've rescued elite forces, which can be done on two separate occasions on Mission 1 and Mission 4, they can also be called down periodically from this structure similarly as the SC2 counterpart Merc Compound can do. Your strategy can thus become do you wish to call down mercs or upgrade. Building multiple compounds may allow you to overcome this obstacle. Keep in mind, similar to the SC2 merc compound, elite reinforcements have heavy cooldown periods and are limited per mission.
- Upgrades/Units Available:
Neosteel Plating - Gains +2 armor for most structures.
Fortified Bunker Frame - Only available after Terran03+. Gains +1 slot, +100 health to bunkers.
Hi-Sec Hellstorm Upgrade - Only available after Terran04+. Missile turrets gain +1 attack range and a second splash damage
Shock Division - Only available if rescued in Terran01. Summons 2 Elite Siege Tanks
Field Response Theta - Only available if rescued in Terran01. Summons 4 Elite Medics
Dragon Knight/Red Adder - Only available if rescued in Terran04. Summons either 2 elite Dragoons or 3 elite Diamondbacks, depending on plot cannon.

Plot Choices
There are several plot choices that will grant you additional units or missions in this campaign. Here are some of the options:
- Terran01 - Trapped Mercenary Squadron
- Save Mercenaries -> Gain Shock Division, Field Response Theta as reinforcements in certain missions and to summon at the Black Market Compound
- Fail to save Mercenaries -> NOTHING! (save them...you prick)
- Terran02 - Scientists
- Let Scientists Go -> Allows SCV to build Perdition Turrets in Terran03+
- Kill Scientists -> Allows the Factory to build Predators in Terran03+
- Terran03 - Plot Arc
- Save Protoss -> Moves onto plot A-canon. Omega Squadron is defeated by the Zerg.
- Kill Cerebrate -> Moves onto plot B-canon. Schezar troops escape as Protoss prisoners are killed.
- Terran04a - Reinforcements
- Assist rescuing other non-operation Protoss -> Allows the Starport to build Banshee's in Terran05+. Gains the ability to call down a Banshee airstrike in an area.
- Assist in current operation -> Allows the Factory to build Hellions in Terran05+. Gains a few for current use.
- OTHER -> There are eliteDragoons to rescue here regardless of this plot choice. Once found, they can called down via the Black Market Compound.
- Terran04b - Prisoners
- Let prisoners escape -> Allows the Barracks to build Marauders instantly onward, several drops arrive.
- Keep the prisoners in -> Allows the Starport to build Vikings instantly onward, several arrive.
- OTHER -> There are elite Diamondbacks to rescue here regardless of this plot choice. Once found, they can called down via the Black Market Compound.
Mission Overview
Terran01 - Schezar's Scavengers
Palladium To Be Found: 5
Iridium To Be Found: 5
New Weapons To Be Found: Pulse Grenade
Ally Heroes: Gui Montag
New Tech Available/Restraints: Full ground Terran tech except no air units with no starport. Combat
Shield/Neosteel Plating from BMC is available. Flashbang Grenades can be upgraded as well later.
- Ensure you explore the map thoroughly here, there are many palladium and iridium pickups leading to your first level-up's in both. Only the Commander can pick these crates up!
- You are introduced here to a firebat hero - Gui Montag. He has a strong damage output against ground forces but relatively low health. Ensure he is kept alive by placing medics on heal duty at all times.
- Plasma Grenades are found on this map to the right after you pass the infested colony. Be sure you pick these up! Watch out for infested terrans however
- Destroy all zerg structures by the infested colony to utilize a free expansion for your base once you get SCV reinforcements.
- There are several mineral and vespene resource pickups available around the map to give you an early economic boost once your SCV's are deployed
- Consider securing the north west area below the gas station between the zerg and terran bases for a strategic defensive position
- Only a single unit needs to make it to the elite squadron to rescue them. Consider a diversion team while a fast moving unit such as a vulture goes in to rescue them to make the achievement timer.
- The elite siege tanks are incredibly powerful, but are still weak in health. Support them with SCV's on repair duty. You can call down more of them once rescued.
- Your two main attack patterns should be either a Marine/Firebat/Medic combination, a Goliath/Siege combination, or both. Again, watch out for infested terrans here, some will only deal weak melee damage while others will suicide into you for massive area damage. Best kill them on the spot. Queens can be a pain with ensare, use goliaths to snipe them quickly.
- Attacking the enemy Command Center will alert all nearby mercenaries to defend the base. You should be prepared for a major assault if you are going in for an all in strike.
Terran02 - Into Darkness
Palladium To Be Found: 3
Iridium To Be Found: 3
New Weapons To Be Found: Hellfire Blast
Ally Heroes: Gui Montag
New Tech Available/Restraints: No buildings, only marines, medics, some mechanical units.
- Medics are essential to surviving this mission. If you had rescued the elite squadron you will gain Field Response Theta units, otherwise, normal medics. Either case, keep them alive at all costs or you will find this mission nearly impossible to win on either difficulty level.
- Some doors are sealed while others will respond when in proximity to your units. If sealed you must use a charge to open them. Be careful with charges and when to use them.
- Gui can acquire an even more devastating attack to ground forces behind one door early in this mission. Consider using him in your frontal assaults but keep him healed at all times. Remember his attacks do minimal damage against mechanical units so use marines or the Commander to handle.
- You will be approached with a decision early in this mission behind a sealed door to let mercenary scientists live or die. The case for either is made and the decision is yours alone. Note that the effects of doing either will be reflected in future missions only - there is no correct answer.
- Don't charge too fast in this mission. There are automated turrets and enemies everywhere. Use a hero to scout ahead and then use your supporting forces accordingly. This will help you keep every unit alive, which you will need later
- When you reach the point at which Gui and the Commander can meet each other, do NOT engage the enemies clustered there. While tempting to stun and area grenade them, there is an alternate method to dealing with them. The Commander can activate a terminal to reprogram spider-mines to destroy most, if not all, of the forces there. Otherwise, you can try and bust your way through, but it is not recommended!
- When the countdown timer starts, this is where you need all your units alive from before. The more you have the better chances you have of surviving now. There are reinforcements to the left as well to increase your odds more
- When you reach a path of left or right at the first terminal, go right to acquire a pickup, although it is a dead-end. Be warned of an ultralisk that gets loose. Don't get too close.
- Back on the left path, when you get to the scientists station you will find numerous zerg including ultralisks at higher difficulties. Always lead with the Commander if possible, but keep him alive. He only has 300-350 max health at this point. If going for the health achievement, this makes it even more difficult to keep his HP high.
- When you reach the exit you'll find its locked (doh!) and you'll need to wrap around a corner to unlock it, there is a spawn zerg point near here, careful on the enemies coming from it to corner you. Don't get yourself cornered. If you feel overwhelemed you can run for it and flashbang your way out of there, but if you lose all your allies, you'll be alone and very vulnerable.
Terran03 - Playing with Fire
Palladium To Be Found: 7
Iridium To Be Found: 5
New Weapons To Be Found: N/A
Ally Heroes: Tom Kazansky, Magellan
New Tech Available/Restraints: No Battlecruisers. Reinforced Bunkers is now available at BMC. Upgrades to your Pulse Grenades is possible at this point.
- This mission consists of two parts. The first part is a survival mission. The second part is a build up an army and seek out the objective mission. Dealing with the first part is no picnic. It becomes increasingly difficult on higher difficulties. To survive, ensure you are constantly building SCV's with a healthy economy and keeping several to the east, north, and west on auto-repair duty, where enemies will be coming in.
- Kazansky is a powerful wraith that can hold his own thanks to his ability to block all forms of enemy attacks while cloaked. To that end, he gets an extra 50 energy which helps him do just that. Always keep him cloaked when fighting! Be careful on watching his health. Keep Magellan on him for heal duty or SCV's
- Magellan is a unique hero that is part Science Vessel, part proto-Raven, part...something else. He notably comes with the ability to auto repair mechanical vehicles, so he and Kazansky are the best of pals. But he is also useful to heal your elite Siege Tanks here. Other than that, he has Defensive Matrix which works wonders on The Commander or Kazansky. Defense Turret won't do much damage wise, but is used more so as a distraction against the enemy waves. His final ability, Seeker Missile, deals a whopping 300 splash damage towards a target enemy, but takes 5 seconds to "lock on". It cannot be used on structures but woks great in a survive scenario with clusters of enemies.
- There are several supply crates with resources in them to the east and west of you, pick them up with a unit to get a boost of resources early.
- Build as many bunkers and missile turrets as you can along the cliffs. Terran dropships will come to the east quite often so bunkers are preferred there while zerg mutalisks like to attack mostly from the north, but overlords will still drop some north so its best to keep bunkers everywhere. Guardians will occasionally attack you so make sure Kazansky and some wraiths snipe them before they outrange your turrets.
- While you shouldn't need to concern yourself too much on the west, consider building 2 more bunkers and a few more siege tanks with some scv's, and it should be self-sufficient. If any are destroyed quickly repair and re-concern yourself with the main threat of the north and east attacks.
- During the attack, the zerg will launch two "new" types of nydus canals, called nydus worms. These are your friendly worms from SC2 and will burrow into your base. Hard difficulty will spawn +2 more and produce zerglings while easier difficulties only produce broodlings. They will spawn indefinitely so take them down ASAP or your base is done for.
- As in traditional starcraft timer missions, as you approach the final 2 minutes, Schezar and his Zerg will go all-in and launch everything they have at you, including a second nydus worm attack. To prepare for this, ensure your entire base is completely filled with missile turrets, tanks in siege mode, and bunkers, bunkers bunkers. With any luck, the worms will be instantly killed when they burrow up and all the drops will be dealt with. Use Kazansky again to snipe with any out-ranged Guardians. Once the timer reaches 0, you can breathe again and watch Warfield kick some Zerg ass.
- Once you re-gain control of the battle, your map area increases and you have a choice between a rescue attempt or a kill attempt. The "easier" option and B-canon is the kill attempt on the Cerebrate just north of you. You likely are in need of rebuilding so take the time you need, build up a force, and take it out. CAREFUL! - Any damage you deal to it will cause it to spawn and unburrow zerg near it, so don't think the Cerebrate is so defenseless. If you want to take the "harder" option and A-canon, the rescue attempt, you don't need to destroy all of Schezar, but you can do the optional objective and destroy 3 power generators. Once done, all his missle turrets will go offline, allowing an easy wraith/dropship combo up the east/north side.
- Don't forget - While Warfield has a bunker/tank defense, he isn't immune to attacks. He will request assistance every so often if you don't deal with the Cerebrate's Zerg. Consider destroying the Zerg there, even if attempting to do the A-canon.
- There are a lot of palladium/iridium pickups here, don't rush to complete the final objective before you've explored the map fully.
Terran04a - The Rescue
Palladium To Be Found: 6
Iridium To Be Found: 7
New Weapons To Be Found: Jetpack
Ally Heroes: Warbringer, The Danimoth
New Tech Available/Restraints: No controllable buildings except BMC. Only organic Terran and Protoss combat units. Hellfire blast upgrade is possible at this point. Missile Turret upgrade damage also available.
- This mission is a bit unique in the fact that you don't have an army to control, an AI controls it. Instead you have your Commander hero, and a handful of Terran and Protoss allies to control. You also have access to your Black Market Compound with a limited amount of resources. You may use it to purchase some upgrades for him, some upgrades for your AI's base, or call down elite reinforcements. As you can't get more resources on your own, you have to use this wisely. It is HIGHLY recommended you at least purchase the Combat Shield as 90% of the enemies you face here are ranged.
- Always push out with your AI allies. This improves your chances of taking down a base and gaining ground. Don't bother restoring them, they are expendable, but their base isn't. If their base is destroyed, you won't be able to win.
- Once you take the first base, your AI allies will instantly be able to construct a new base there and you will have access to a new controllable hero unit - The Warbringer, a Reaver. This bad boy has the same damage as a regular Reaver, but is extremely tough to take down thanks to its Hardened Shields ability (10 damage per attack while shields are up) and its unique ability to regenerate its hull (health). However, scarabs cost money and money is hard to come by. While you get some more money after you get him, you may wish to purchase more upgrades for the Commander, or calldown more tanks or medics, or, save money for valuable scarabs. The choice is yours. But once you're out, you're out until you liberate the next prison
- Soon after you liberate the first base, an option choice comes where you have additional reinforcements that can be given to you now or used to assist more trapped Protoss off-site. If you decide you need the reinforcements now, you can get them and later in the mission you will be given liberated Hellions stolen from Mengsk when you defected, also will be buildable in future missions. If you want to help other Protoss, you get nothing right now, but will get a surprise "Banshee Airstrike" later in this mission that is immensely helpful, as well as the option to build prototype Banshee's later (no cloak), stolen from a Schezar base the reinforcements liberated.
- Mid-way here there is the option to get the Jetpack. This allows the Commander to become MUCH more mobile with a dramatic speed boost and the ability to jump up and down cliffs. Use him to scout the entire area now and grab goodies as you need to.
- Once you secure the second base, you will get the Danimoth, an Arbiter. This guy has all the abilities of a regular arbiter plus the ability to Blink without using energy as well as the ability to use Vortex, a SC2 Mothership ability. His ability to disrupt enemies is powerful and if under too much damage, can use Blink to escape. Be warned as the Danimoth can easily be destroyed by the enemy as he is the only visible thing once all your units are cloaked under him.
- While you seamingly now seem unstoppable with three bases and three heroes, Schezar's forces don't give up and send some last minute enslaved zerg upon you. Take down their nydus worms and their small but formidable zerg base to stop the never-ending spawn-rate against your base. If you got the reinforcements and still have Hellions, now would be the time to use them with their large flamethrower which works very well against zerglings or broodlings. Otherwise psionic storm works very well here to push towards the zerg base. If you decided to use the extra reinforcements to save other protoss (you were so kind!) you are now well rewarded and are treated to a massive proto-Banshee airstrike against the Zerg. These should completely obliterate the Zerg base including the nydus worms, or at least, damage them to 80-90%. Finish the rest up at your leisure.
- There is a hidden area near here to recruit elite Dragoons called Dragon Knights. They have the stats near of Fenix as a Dragoon and can be called down from the BMC as well. It is HIGHLY worth it to save them for this mission and beyond.
- Other Protoss units can be saved throughout this map in the forest to boost your controllable units.
- Schezar's final base has the high ground with tanks and bunkers galore. Your best bet is using the Danimoth to disable a ramp while your forces take out the tanks. Then rescue Mojo to end the mission.
Terran04b - The Pursuit
Palladium To Be Found: 6
Iridium To Be Found: 7
New Weapons To Be Found: Oculus
Ally Heroes: Tom Kazansky, Magellan
New Tech Available/Restraints: Full tech except UED Valkyries. Limited Diamondbacks available. Hellfire blast upgrade is possible at this point. Missile Turret upgrade damage also available.
- This mission is vastly different from 4a. You have a full base to control with the assistance from Kazansky and Magellan again. You have a full tech tree at this point, with the option to build Battlecruisers. However, you will find them to be more trouble than their worth. Your objective is to stop transports from departing the area. They are only identified on the map until 1 minute before leaving. Once they are ready to lift off and depart, they move relatively briskly towards the opposite side of the map, and you need a fast moving air unit to chase them down to snipe them. Kazansky is powerful but he will need many more wraiths to help take them down before they leave and you lose the mission.
- There are three primary Schezar bases surrounding you. You do not need to destroy them, only the transports, but taking them out opens new expansions for you as well as reduced assaults against you.
- There are several items around here for pickup but it is dangerous to wander around alone. Consider a helpful cadre of allies with the Commander while you search for goodies.
- South of your position is a small prison site. Once you locate it, a familiar face (well familiar to you and I) will contact you from a long way across the sector to ask you to help him release them. Make your decision and get the reward (Note - one option gives you access to the prototype for the Viking, only in aerial mode. It's ability to hunt down transports would be very helpful here (as will be against a certain Protoss Mothership in 6b). The other option gives you marauders, powerful against large units but cannot use the SC2 slow effect being a prototype. May not be very helpful here, but very helpful in later missions against the Protoss. The choice is yours.
- You also have access to fully upgraded Diamondbacks from Omega Squadron. They can be very useful to take down the many ground forces you find here. They are quite useful at taking out bunkers, tanks and goliaths as well.
- Mid-way in this mission a truck is seen moving about the map with useful contents. Take it out when it approaches near your base and use the Commander to grab the contents. It will give you the Oculus, giving him a detector ability to see cloaked units like wraiths and ghosts as well as increased sight and range.
- East of your position are trapped elite Diamondbacks called Red Adders. They do what Diamondbacks do best, annihilate ground forces. Liberate them and they will be your best friends. Like in 4a for Dragon Knights, these can be called down from the BMC.
- If going for achievements, you want to ensure no dropship lifts off. It may take a few playthroughts to identify every single dropship locate ahead of time, but having an army of wraiths is ideal to sniping every single dropship first. Taking the southern base as an expansion is likely your best option although the north base is also an acceptable location. If you are fast enough, you can take both, but it is unlikely you can take all three and win the mission without a transport lifting off.
Terran05a - Defenders of Aiur
Palladium To Be Found: 4
Iridium To Be Found: 6
New Weapons To Be Found: Chronorift
Ally Heroes: Mojo, Fenix (non-controllable)
New Tech Available/Restraints: Full tech except UED Valkyries. Lazarus Protocol ability is now possible to purchase at this point.
- Welcome to Aiur. Your objective here is to defend three Nexus' points that lead into city entrances. If a Nexus falls, a shield barrier falls, and you lose. To make things more challenging, there's an achievement that if any structure falls in the Protoss defender area, you will lose, but its just an achievement. There is a set structure to how the Zerg attack in the beginning to make things fair. They will always attack the south point first with a start strike force. Then the east, then the north. The east and north points have mid-way zerg hiding about, so you can't walk there freely like you can the south. Once they have attacked all three locations at least once, the attacks will come randomly to any location and they will come hard. You need to ensure you send constant SCV's to build bunkers, barracks, turrets, factories, anything to reinforce the area. Always put your structures and units ahead of theirs. A Zerg should never even get near one of their units to be successful here. There's a lot of micro-management here in the beginning. As you get control of the map, it becomes less of a headache.
- You will have access to Mojo as an ally hero, as an elite Scout. He has more or less the same stats as Artanis does from Brood War, but he also has the ability to summon a psionic storm, which is very useful against the Zerg. He can also get to Nexus points quickly using an ability called After Burners which effectively doubles his movement speed for a brief time. Be wary however as he can be quickly destroyed by enemy Hydralisks and/or Scourges. After Burner is a fantastic ability to rapidly escape to safety.
- You don't have a lot to start here so be sure you get resources and get resources fast. There is a free expansion directly south of Fenix's base and one you need to fight for more north..
- You can pick up the Chronorift device north of you, just south of the main Zerg base. This is super helpful to disable zerg waves, use it!
- Fenix, bless his heart, will himself and a small army go to defend a Nexus point if it is attacked. While Fenix is strong, if he dies, you lose. If he's caught in the middle of a Zerg wave, he loses. Best way to stop that is, as is said before, make sure a Zerg never hits a Protoss structure. If it does, protect Fenix at all costs. Eventually he'll return back to his base to recover. Fenix should never assault the main Zerg base, as that would be instant suicide for him. His forces, will, occasionally, attack the base. When you are ready to end the mission, time your main attacks with his, and destroy the hive.
- The Zerg that attack the three nexus points will spawn to the far east and far west sides. Don't be a smart ass and try and bunker the areas. The zerg have invulnerable structures and special creep to prevent building there. While you can build up near it, you can't build directly ontop of the spawn points.
- When you destroy the main zerg hive, ensure all three nexus points are WELL defended...like WELL. The Zerg from the spawn points will launch a surprise (mutha f'ker!) attack on ALL THREE NEXUS POINTS in high numbers which will test how well you did defending it. You need a lot of bunkers, tanks, and turrets to survive it. It's recommended the Commander stays well behind to survive but if you have Lazarus Protocol on feel free to bring him out to fight.
Terran05b - Assault on Aiur
Palladium To Be Found: 4
Iridium To Be Found: 6
New Weapons To Be Found: Stim Infusion
Ally Heroes: Warfield (Marine)
New Tech Available/Restraints: Full tech except UED Valkyries. Slightly stronger version of Marines, Firebats,
Goliaths, Siege Tanks, with ability to build more Diamondbacks available from Omega Squadron base. Lazarus Protocol ability is now possible to purchase at this point.
- Welcome to Aiur...time to burn it. Unlike 5a, Mojo isn't there to clear the hostilities. Thus the Protoss want to hurt you. You have two bases to control on either side of the river, the Commander's and Warfields. You can actually control Warfield as a Marine hero but he is in no way as strong as the Commander is from collecting all those rare materials or finding all those weapons. Still he can hold his own if confronted. He has a healthy 400 HP with a base 3 armor and his default rifle can deal moderate damage. His usefulness comes from his two abilities. Fragmentation Grenade is a reverse Pulse Grenade, without the backlash damage to him. It deals 100 base damage to everything and 200 damage to mechanical units and structures, just enough to take out photon cannons in a single shot. Good thing because there are many many photon cannons. Use Warfield to clear them before moving in. His other ability, KD8 Charge, tosses a breaching charge in the middle of the field and instead of mass damage, any unit affected is treated to an EMP blast and pushed away from the charge point. EMP's, for Protoss, are deadly, especially in SC1 as it drains their shielding to 0, including energy. Two drawbacks. First, the charge can be destroyed by the enemy when placed, it takes 2-3 seconds to explode, so don't toss it first, wait for a battle to occur for a pre-occupied enemy. Second, your allies can be affected by it, so be sure there is some distance or no energy units are within its blast radius. It will deal a minor 10 damage, but this can be deadly to mass marines if used poorly.
- Omega Squadron can produce more powerful ground units than Alpha and as such you should be building tanks, goliaths, diamondbacks, marines, firebats, and supporting medics exclusively. Alpha should instead be building what Omega can't, which are Science Vessels for their EMP's and Defense Matrix's, and the ever potent Battlecruisers. Together, you have a powerful team. You just need to join up, which you can't yet.
- In order to win here, you need to destroy a super warp gate at the center of the map. Periodically this warp gate summons Protoss units that will seek you out, in addition to the normal waves against you. If timed poorly, (or successfully if your the AI), the spawns and the AI waves will come together and you've got a major Protoss wave against you. You know its been warped in when the lighting and sound creates a warp effect. There is also a countdown to let you know.
- If you attack the center gate directly, it will simply regenerate its shielding rapidly. In addition, it will auto-spawn more Protoss quickly. Thus, its not a good idea. To stop it from regenerating you need to take out three shield power generators nearby. Each generator destroyed reduces its shield regeneration by 33%. Not all shield generators need to be destroyed to win the mission, but it helps. One is a somewhat freebie to the west of Warfields base. Once this is destroyed, you can technically win the mission with superior firepower from a massive Battlecruiser and Tank assault on the gate. If you want to do a more complete approach, destroy the remaining two generators, located in either Protoss base, one north west, and one south east. You will also find a component for the Commander's "Stim Infusion" ability there, so its well-worth it to mop up the map.
- Once all generators are down, there is no more regeneration, allowing an easy time. Be-warned, the gate will still auto-summon reinforcements if attacked.
Terran06a - The Final Blow
Palladium To Be Found: 5
Iridium To Be Found: 4
New Weapons To Be Found: Automatically gets Kinetic Barrier ability for Commander once 30 Palladium has been found, only possible in this mission.
Ally Heroes: Mojo, Warbringer, The Danimoth
New Tech Available/Restraints: Full tech except UED Valkyries. Full Protoss tech except additional Arbiters or Reavers.
- This is it, the final mission for A canon. You have a combined Terran and Protoss force available here, giving you access to both Battlecruisers AND Carriers. However, you have a heck of an enemy to destroy and you have a timer against you. So you don't have the luxury of turtling in your base and building up a massive aerial army. Still, the superior firepower of both armies is well-deserved.
- You have access to all Protoss heroes from 4a, including Warbringer and Danimoth. You also have access to Mojo again. Unique to this mission are the hero surviving requirements. The Commander and Mojo MUST survive, however, Warbringer and Danimoth do not. Keeping them alive, however, is in your best interest of course.
- Attacks come in hard and fast from both your south point and north point. Both the Zerg and Terrans will unleash everything they have at you, including stolen Omega ground upgrades that you would have gotten if you did B-canon. They also stole Diamondbacks (bastards). If that wasn't bad enough, they will even launch nukes against you, so make sure you have an observer or science vessel nearby to spot the ghosts.
- Soon into the mission, the Cerebrate launches the first and genetically modified version of the Ultralisk at you - The Torrasque. This elite Ultralisk is incredibly strong and hard to kill. Marines do little to take it down with its armor and health, so use siege tanks, photo cannons, and battlecruisers. The Commander and his disables also do well. NOTE! - The Torrasque is IMMUNE to flashbang grenades due to Frenzy. It is NOT Immune to Chrono, however. While the Torrasque is as bad as you remember from Brood War, it is even worst in its proto version here. Upon each reincarnation, it will grow slightly stronger and more difficult to take down. This "doomsday" Torrasque thus must only be stoppped by taking out the Cerebrate quickly.
- The best way to stop the Cerebrate is by sniping it from behind via the air, either with wraiths, scouts, cruisers, or carriers. Mojo can also help here with the Danimoth. Once the Cerebrate is killed, the ENTIRE zerg force in this map becomes inert, giving you a MUCH needed breather here. The Torrasque also instantly dies and will not respawn again.
- Upon approaching Schezar's base to the east or if the timer dips too far down, the Overmind's Swarm and "Real Zerg" appear to the far North West. These guys take no crap from anyone...they are fully upgraded after having laid waste to Aiur from Episode II of Starcraft. They instantly seek out and will destroy you AND Schezar, although, they mostly want to kill you being closer to them. Although the Overmind is aware of Schezar's intention of controlling him through the energy towers, he isn't aware of how closer they are to completion, and takes his time in attacking him, focusing more on you instead. Silly Overmind. When this happens, the music changes and you need to be on the defensive here ready to accept a battle from the Zerg. Once you fend off his initial attack, you have to be ready to defend against him once every few minutes, but you need to be ready to take down those towers to end the mission soon or you will find yourself overwhelmed. TIP - Because this is triggered upon approaching Schezar's base, do not trigger this until the timer forces you to trigger this. This allows you to build up the greatest possible army first. If you trigger this by accident just reload your save if you find yourself unprepared for the assault.
- TIP - If you are nearing destroying all four towers but the Overmind is destroying your base, just finish the mission. You have no reason to keep the base, you need only take out those towers! Mind the timer!
Terran06b - The Final Blow
Palladium To Be Found: 5
Iridium To Be Found: 4
New Weapons To Be Found: Automatically gets Kinetic Barrier ability for Commander once 30 Palladium has been found, only possible in this mission.
Ally Heroes: Warfield (Battlecruiser), Tom Kazansky, Magellan
New Tech Available/Restraints: Full tech except UED Valkyries. Ability to call-down fully upgraded, slightly stronger versions of Omega Squadron ground forces periodically.
- This is it, the final mission for B canon. You have only Terrans to control but you have two Command Centers and many resources. While you can't "build" Omega Squadron ground units like before, you have a structure that allows you to "call down" instant fully upgraded Omega Squadron units. These are super helpful to assist you in a pinch. It is recommended, however, to simply call down them whenever they are available. Or, you can wait until you are under assault then call them down. Your choice.
- You have access to the Commander, Kazansky, and Magellean here. In addition you have access to Warfield, but not in his wimpy Marine model, now you can have him in his Battlecruiser model - The Ragnarok! This mammoth cruiser can take a lot of punishment so use it to your advantage. Similar to 6A, Kazansky and Magellan are expendable here, but the Command and Warfield are not (obviously...Warfield is needed for WOL)
- Attacks come in hard and fast from both your south point and north point. Both the Protoss and Terrans will unleash everything they have at you, however, they won't have stolen Omega ground upgrades that you would have faced if you did A canon. They will however launch nukes against you, so make sure you have an observer or science vessel nearby to spot the ghosts.
- Soon into the mission, the Protoss launches a desperate move - they warp in from deep space a Mothership. Rarely used at all, and recalled far too late to save Aiur from the Zerg before the Overmind arrived, these massive ships range from support vessels to this particular version, which is well capable of fighting and defending. This Mothership will slowly approach your base and deal incredible damage against you as well as create wormholes to disable you. After dealing enough damage to it it will warp back to its temple to heal. Eventually it will return back to your base and attack again. The only way to stop this cycle is to take out the temple itself. The Mothership is invulnerable when it warps back to heal so you must destroy the temple first. Once that is complete the Mothership is left vulnerable to attack. However, it will only then unleash its final most desperate move - the planet cracker. After the temple is destroyed the adjutant will warn you the ship is charging up. Once done, it will create a beam that will destroy anything in a large radius around itself. It is best to move out of the way when it does this until its stops. If you still can't destroy it after this, it will move into a suicide run to your Command Center where it will unleash this devastating attack there. If it can succeed there, its game over man! Game Over! You need LOTS AND LOTS of anti-air to stop this thing. Wraiths, goliaths, turrets, will all help here. Mass Marines is an option but its multi-attack will obliterate them all, so be careful.
- Once the Mothership is down, the Protoss will halt its attacks for a brief while, but not turn inert like the Zerg. They will resume eventually, so be careful.
- Upon approaching Schezar's base to the east or if the timer dips too far down, the Overmind's Swarm and "Real Zerg" appear to the far North West. These guys take no crap from anyone...they are fully upgraded after having laid waste to Aiur from Episode II of Starcraft. They instantly seek out and will destroy you, AND Schezar, although, they mostly want to kill you being closer to them. Unique to B-canon, however, they will send a special wave to utterly destroy any Protoss still remaining north of you, so at least you don't have to worry about them. Bad news...after they are done, that waves comes for you! Although the Overmind is aware of Schezar's intention of controlling him through the energy towers, he isn't aware of how closer they are to completion, and takes his time in attacking him, focusing more on you instead. Silly Overmind. When this happens, the music changes and you need to be on the defensive here ready to accept a battle from the Zerg. Once you fend off his initial attack, you have to be ready to defend against him once every few minutes, but you need to be ready to take down those towers to end the mission soon or you will find yourself overwhelmed. TIP - Because this is triggered upon approaching Schezar's base, do not trigger this until the timer forces you to trigger this. This allows you to build up the greatest possible army first. If you trigger this by accident just reload your save if you find yourself unprepared for the assault.
- TIP - If you are nearing destroying all four towers but the Overmind is destroying your base, just finish the mission. You have no reason to keep the base, you need only take out those towers! Mind the timer!
-
View User Profile
-
Send Message
Posted Sep 16, 2019Thank you for making amazing series.
I'm playing enslavees Terran04a Rescue and the jet pack isn't working.
So I can't collect bonus missions.
Pleases help me