
Enslavers Redux Gameplay Guide/Episode IV (Epilogue) Strategy Guide
Campaign Overview
Story Prologue: This three-mission episode culminates the past three campaigns you completed by having your primary hero complete 1 final mission using all of their stats, bonuses, and abilities you've collected thus far. Shortly after Ulrezaj was imprisoned with Zamara within the Khaydarin crystal on Ehina, Kerrigan collected her remaining zerg and began to find clues onto who Duran actually is and what the future entails with his Hybrids soon being able to run loose upon the sector. She instructed her swarm to find any traces of the hybrid which led her to a colonist settlement world, and oddly, the Dominion.
Yet upon that world an old ally of Kerrigan's, when she was human, was there trying to right the wrongs the Dominion has been causing - The Commander. Although his promise to his crew of settling down outside of Dominions pace and living peacefully was made years ago, the Commander knew he couldn't stand by while Mengsk and his Dominion guard reined down terror on the sector once again. Having formed his own rag-tag militia of freedom fighters to liberate civilians when possible, he found his way on a colonits world enslaved by the Dominion attempting to save civilians from being slaughtered by the Dominion. Unknown to him, the Queen of Blades was on her way to find the source of the Hybrid signal on that world, and an old friend to both of them was about to be caught up in the middle.
Zeratul meanwhile had already begun his own journey into what the Hybrid threat meant after having traveled to the world Zamara had shown him, Pegasus. When he arrived, the Dark Prelate came across a Xel'naga temple. Soon after approaching, the temple hatched and released an energy creature. Fascinated, Zeratul followed the newborn creature into space to a gathering of similar creatures. They began moving faster and grew increasingly bright. In a blast of light, they disappeared, leaving a wormhole, through which Zeratul could see a glimpse of a single world. Overcome by curiosity, Zeratul began to move into the wormhole, knowing that whatever was on the other side would change everything...
Hero Overview
The Commander Kerrigan Zeratul 

You will have access to The Commander, Kerrigan, and Zeratul, in 1 mission in the epilogue campaign, for the Terran, Zerg, and Protoss missions, respectively. The hero will have every ability and "level" you have thus acquired in their respective campaign. In addition, you will have access to every "Wings of Liberty" type unit, which is mostly a bonus for the Terran and Protoss missions as you had most of the Zerg already by the end of Kerrigan's campaign. There is no more secrets to find or plot choices to make. You simply must complete the mission and win any achievements you want.
Plot Choices
There are NO further plot choices in these missions. Each mission is a culimation of whatever decision you made prior. The gameplay, therefore, can change based on certain paths you took, whether you went the A or B path for a different hero build or which extra unit(s)/bonus(s) you may have chosen along the way. Different combinations can assist in different situations!
Mission Overview
Epilogue01 - The Price of Freedom
- Race: Terran
- Hero Available: The Commander
- In this mission, you find yourself back in control of the Commander. If you've missed him, you'll find he has all the same powerups (total Palladium/Iridum + any weapons/items found) you last had in your most recent playthrough of Episode 1.
- Since timeline wise we're now very close to the beginning of Wings of Liberty in SC2, the Commander's army has undergone some major update to the build, namely, most mechanics now follow SC2 parameters (movements, flags, types, unit speeds, etc), supply depots can lower, Barracks/Factory/Starport can build Tech Labs/Reactors and each and go to the them interchangeably, Battlecruiser attack damage/speed, and many more. However, some "special" units that you acquired during your Episode 1 playthrough won't automatically be here unless you indeed acquired them. These include: Perdition Turrets/Predators, Hellions/Banshee's, Marauders/Vikings. Your drops of Siege Tanks, Medics, and Dragon Knight (Dragoon elite)/Red Adder (Diamondback elite) are also available if you acquired them. Uniquely for B-canon however, you can build regular Diamondbacks simply if you completed B-canon on your last plathrough having kept that Dominion technology. Some of these depend on if you did A/B canon and what choices you made. You can't have them all, if you got them all, its whichever playthrough option you did last. Note that you will still maintain all your Starcraft 1 units and their upgrades (some come pre-loaded...medic/marines), so you are free to continue to build Goliaths, Wraiths, Vultures, etc. Sadly, Valkyrie's are never available to build for the Commander as he never was around to acquire that UED tech)
- Once you get control of your base, you'll find Raynor has already secured the dropship zone. Your goal is to get at least 50 civilians to the beacon there. You automatically start with 30 at your base, so you need to save at least 20 more. There are just over 100 civilians in total around the map. The rest are all hiding in different locations around the map. When you approach a zone with a civilian, you will be alerted you need to clear the area of enemies. Once done, they will come out of hiding for rescue. Be warned...if a civilian dies, they die. Keep them alive at all costs!
- You get three types of ground transports...basic, military, APC. Basic is the fastest, but light on health/armor. Military has modest armor and a small gun turret to fend off attacks, but moves a bit slower than the Basic version. The APC is the heaviest armored version, but moves the slowest. Use the transports you feel works best, but remember if they die with civilians inside, they all die.
- TIP - If you try and "cheat" by using dropships in this map, the Adjutant will alert you to high concentrations of Zerg scourges in the area that have been picking off dropships. Any dropships that area in the area will have constant scourges attempt to bomb them out of the sky. It is your choice if you want to risk death by having a heavy air support around them to fend them off while you air lift civilians to safety or stay on the ground for ground transport only.
- While Raynor does a decent job of holding his ground at the dropship zone, he will come under constant attack by the Dominion to retake the area. If things become too dicey for him, he may request your help. Be sure you clear a path to the area to give him the resources he needs. If the dropship itself becomes under attack, Raynor will pilot the Hyperion for a final defense support. However, while the Hyperion is incredibly powerful and can take a beating, if it dies, the mission will fail.
- Zerg will spawn continuously to strike at your starting position from the south passage, the east passage, and the west caverns. You can setup defenses to stop them but you cannot prevent them from spawning.
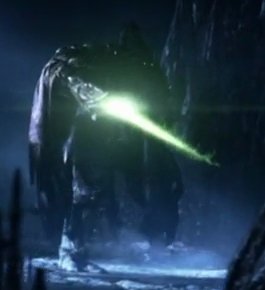
- Soon into the mission, Kerrigan will arrive to support her zerg. When this happens, Valerian will activate one of Arcturus' "weapons" he's been hoarding, a high powered laser. From this point, the laser can randomly attack and kill either a zerg or one of your units at high range (not unlimited) if it wanders too close. If units get up close and personal to the laser, it will rapidly attack. Try and take out the laser for an achievement! (be warned...the Dominion won't like you doing that)
- Once Kerrigan arrives, she will order drop pods to begin penetrating your base from her Leviathan in orbit around Umoja. Drop pods cannot be stopped and will always carry a creep tumor with them, alongside a small payload of zerg ground warriors of Zerglings, Hydralisks, or Roaches. You need to keep a healthy supply of bunkers/siege tanks within your base to weather their attacks. The drop pods will not follow your army, but will spawn again if you try and setup a new base near a mineral field....and in larger numbers.
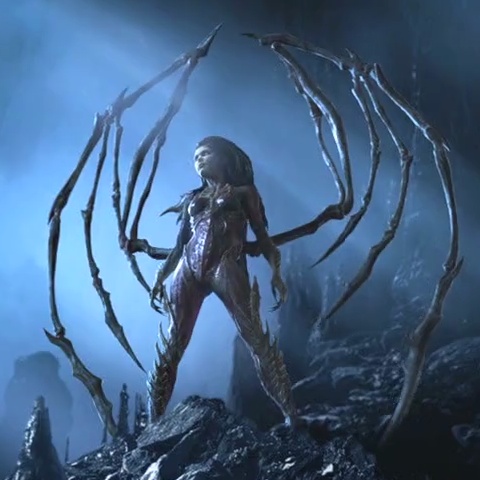
- Kerrigan will occasionally try and attack your base with her attack waves. Regardless of your previous build with her, she will have stats similar to her Wings of Liberty, health at 1000, range/melee attacks strong at 50+, and coming equipped with the "Force Shield" behavior (originally the icon was hidden in WOL, I'm showing it here). Force Shield negates all damage to 10 like hardened shield, and reduces spells to 50% damage. She'll attack like she does in WOL, using Razor Swarm on occasion and Imploding your mechanical/air units....be sure to mass attack her with marines but watch out for her storms. The Commander will be helpful here with his abilities.
- Sometime deep into the mission, Arcturus will remotely order his second destructive weapon without Valerian's approval, endless nuclear barrages. The first nuclear attack will come from within your starting base location's, and after that, will be triggered randomly depending on your armies movements throughout the map. There are several "hot-zones" in the map that will trigger a random roll of the dice. If unlucky, a nuclear launch will trigger, forcing you to re-locate your troops. The higher the difficulty you play on, the higher percentage a launch will occur. The launches are designated by a red nuclear icon in-game but they cannot be stopped. No ghost can be detected or killed, you must simply avoid or weather the attack.
- TIP: Once you've cleared the north east passage to the droppoint, always load civilians to the ship as you rescue them. Keeping them around is a liability you can't afford. If they die, its on you. Once they make it to the beacon, they become invulnerable and are permanently loaded onto the ship.
- After you've secured enough civilians at the droppoint, a popup will appear asking if you want to launch. You can choose to wait if you want to go for the achievement to get 100 civilians, which is near close to all of them on the map. If more than a few civilians have died already, don't bother doing this and just click the button to end the mission. After a brief in-game cinematic, you will have to deal with the Boss of the mission; the Archangel.
- You will likely remember the Archangel from HOTS. This is the first prototype that the Dominion's been cooking up here before de-infested Kerrigan fights it. It has many of the same AI and damage effects from HOTS, with a few exceptions here and there. The battle area is the small raised platform where the dropship was, and it the map bounds are self-contained so you can't escape. In this battle you won't have any backup units, but you will have access to Raynor to help. This can either be a liability or a blessing, depending how you micro. Thus, it is HIGHLY imperative the Commander is at top level to survive.
- As for the Archangel itself, it can attack in three different ways. The most basic (besides regular attacks) is firing a missile for splash damage. It can fire this multiple times instantly at random points around the area. There will usually/always be a couple of spots that aren't targeted, so you need to make sure the Commander and Raynor run as fast as they can there. The Commander is likely faster, especially if you have Jet Pack, but Raynor can use a stim if you need it (keep mindful of his total health).
- The Archangel can also fire powerful gatling guns also randomly around the area. There is a charge-up before this, so similar to the missiles, get ready. It can only fire them either to the left or right, so hopefully you can move over to the other side if you aren't lucky.
- Thirdly, it can switch to its "Fighter" mode and unleash aerial bombardments against you. It is invulnerable here, but the bombardments will strike at random locations around the battle area.
- Periodically, independent of the Archangel's AI, the Dominion may launch droppods with either Marines, Firebats, Mauraders, Goliaths, or Siege Tanks. The # of each contained per droppod is dependent on your difficulty level. It is in your best interest to take these nuiscenses out ASAP before they can build up overtime and form a small army.
- The Archangel's max HP will be dependent on your difficulty, but also, if you have acquired the max Palladium/Iridium (30/30) and are playing on hard, it will gain a secret boost in health to a maximum of 5000. A dialog from Mengsk if this occurs will happen, to notify you you've got the toughest Archangel.
- TIPS: Raynor has access to Stim and Grenades (endless). Always use a grenade against infantry units. Due to the cooldown, just save them up and don't use them on the Archangel. Also use stim when you need Raynor to get from point A to point B, or to focus fire attack on the Archangel. Other than that, keep him with the Commander at all times. As for the Commander, your stuns cannot affect the Archangel at all, but can affect the droppod units, so use them there if needed. Don't bother using Pulse Grenade unless Raynor is in cooldown mode with his own grenades. As for Hellfire Blast, these should be fired as quickly as possible to the Archangel for maximum damage. Hopefully you upgraded prior so you have plenty of shots to get off. Super Stim is very effective here if you have it to heal and deal damage. Chronorift will work on the Archangel too if you have it, also useful if you bait the drop pods units there. Always keep your kinetic shield up for max defense. There are no melee units to tare down the shield. Just keep moving and attacking as much as possible and it'll go down!
- WINGS OF LIBERTY CONNECTIONS - There are three links here within the mission that setup Wings of Liberty.
- First - Arcturus realizes Kerrigan still holds an emotional link to Raynor as he watches her not pursue him from his vantage point on Korhal. He believes he can use this to his advantage to his overall goal of taking her out, which he believes to be his ultimate enemy. (He becomes more and more obsessed with preparing for her inevitable urge to kill him from WOL to HOTS, especially after Findley fails). Arcturus realizes Raynor would never have the stomach to kill Kerrigan, the woman he used to love, if he had the chance to, even though she's given him the opportunity plenty of times. He decides to activate his "ace in the hole", a trusted friend of Raynor's turned prisoner - Tychus Findley. Raynor trusts Findley implicitly, but with his finger on the trigger to kill him if he acts out of turn, Findley would be Mengsk's man on the inside for Raynor's rebel group. It would only be a matter of time between Raynor and Kerrigan meet again. And when the time was right, Findley would betray Raynor to kill Kerrigan for him if Raynor didn't. And...if he was lucky...Findley might even get to kill Raynor, the thorn in his side, himself, and end his incessant rebellion against him his Dominion rule. Arcturus makes the call...
- Second - We see how Duran acquired the persona of Narud. Narud starts off as a real person, Dr.Laurent, who really did start the Moebius foundation for benevolent reasons to help Terrans. Getting assistance from Duran on the side, they gained the Dominion's attention with their work on incredible science beyond what anyone else could do. Multiple facilities are constructed with Moebius' help, most famous of which was Castanar for the "Hybrid Research Program", where Arcturus thought he could use a Hybrid he found to power Terran weapon-systems under his control. They also helped build Skygeirr Station together (under Duran's recommendations to Dr. Laurent, failing to mention there was a series of corrupted xel'naga temples underneath) where the most perverse projects were done in the name of "weapons" research; not the least of which was finding, torturing, and experimenting the resurrected UED Admiral Alexei Stukov, much to Duran's delight. (During this time, Stukov learned about Duran's true identity, his ability to morph into Narud as time went on, as well as his connection to Amon). When their main Dominion backed facility on Umoja was compromised, Duran couldn't risk his work in Moebius being lost or Dr. Laurent betraying him, so he killed him and revealed his ability to morph into his form and take his place, taking the reins of Moebius directly to serve his needs. Erasing all files on Laurent, he re-created his dossier to reflect a Dr. Emil Narud instead to cut all ties to the real doctor. Later, everyone who knew the doctor would be killed, making Narud's secret intact. This begs the question....was Samir Duran a real person before we met him in Brood War...
- Thirdly - We see Raynor distraught, mostly at himself, for being unable to fulfill his promise to personally kill Kerrigan for herself killing so many of his friends, namely the Protoss Fenix he became so close with in the Brood War and recently "The Commander". Unsure what to do next, he ordered the Hyperion to keep its distance from him as he needed time to think. Raynor went to his old home in Mar Sara and took his personal ops transport there. As he sat in the hanger, Raynor thought to himself of his hatred for himself, but even more so, his hatred for Arcturus for turning Kerrigan into what she is today. Raynor's accomplished a few guerrilla strikes against the Dominion here and there, but never a full-scale revolution uprising against Mengsk's rule. If Jim couldn't stop Kerrigan, maybe the time was right to stop Mengsk once and for all and help those people he could...a lesson his old friend the Magistrate from Mar Sara taught him. Still...he needed a drink to sort this out. And Matt Horner knew exactly the first place he'd stop. Joey Ray's bar...
Epilogue02 - Veil of Oblivion
- Race: Zerg
- Hero Available: Kerrigan - Queen of Blades
- In this mission, you regain control of the Queen of Blades and her zerg. You find yourself assaulting (again if you did A canon) Duran but this time you believe you have the upper hand since he didn't have time to prepare for you. Well, that's only half-true. While his Terran guard's are ill-prepared for you, with only a minor force against you, he calls in a favor to his Tal'darim buddies and asks Nyon to warp in his fleet. As such you have to deal with a much larger Protoss force than Terran. While you shouldn't discredit the Terrans here, your major threat is the Tal'darim.
- Before you say, thank goodness there are no Hybrid containers here, watch out; Duran has three separate large warp transports that he's using to funnel in Hybrids at you, a melee and a range. They'll start at you roughly 15 or so minutes into your base building. It's in your best interest to take these transports out ASAP, sniping via Mutalisks or Corruptors works nicely.
- Your main objective is to destroy 5 Crystals "powering" the Xel'naga Keystone, which Duran happens to already have. He wasn't planning on using it on Kerrigan so early, but here she is. Because he isn't prepared, its going to take some time to charge it up. As it stands at mission start, if you don't destroy a single crystal, it will be fully active within 30 minutes. Once active, all Zerg revert to Duran's control, and you lose. Each time you destroy a crystal it slows down the timer by 20%, until eventually by the final crystal, it is stopped entirely. You cannot destroy the Keystone (obviously or SC2 would never happen) or reduce the timer in any other method except this.
- While each Crystal has a sizable Protoss Tal'darim protection around it, once it is damaged, it will "activate" or spill out Void energy nearby. What this means for you is two things. One, any zerg of yours nearby will randomly become permanently mind controlled against you every 2 seconds within a radius around the crystal. This means you need to overwhelm the crystal with lesser units, not massive ones. Secondly, while Kerrigan cannot be mind controlled, she is affected both physically and mentally, losing health and energy per second. You can solo Kerrigan, but be mindful of this effect. Her Leviathan or elite Zerg she can summon are IMMUNE to the mind control effect, so this is a viable option if you choose to solo with her.
- Once you deactivate the Artifact, Duran will warp it away from Kerrigan's grasp and note he will need to break it up for safe-keeping now that she knows about it. She becomes over-infuriated with him and demands a duel once and for all. He takes her up on her offer and suggests she meets him to his chamber. You then have a new objective to bring Kerrigan to the temple door entrance, which now has its barrier removed. There is nothing further to do in this mission at this point but complete this task, unless you want to have fun destroying any remaining Protoss or Terran.
- Once you arrive, the door will open. The next scene will showcase Kerrigan astonished at what she sees, a massive device siphoning Void energy. Some banter takes place, then you will have to fight Duran. This is a very unique 1v1 fight. Duran can shift between 3 forms, his Ghost/Spectre form which you are familiar with, a zealot "Fenix" form, and an infested terran "Stewart" form. All three forms share current health and energy, but have different weapons and attacks. For example, his spectre form can snipe, cloak briefly, put up a barrier, while his zealot form can melee attack stun, twirl attack, and fast attack engage, and finally his infested form can corrosive blast which Kerrigan will take on more incoming damage, as well as corruption bomb an area. All three forms share common abilities such as lifting Kerrigan up in a prison, energy blasts, and psionic storm. Duran will summon his own zerg to attack you, and you should take them out with Razor Swarm when you can. When he begins to summon Hybrid against you, it is entirely your call whether to leave them alone or waste time attacking them. They have high defenses, and wasting time against them will leave Duran time to regenerate his health.
- Duran's shape-shifter form max HP will be dependent on your difficulty, but also, if you have evolved Kerrigan to max STR/DEF/PSI (5/5/5) and are playing on hard, he will gain a secret boost in health to a maximum of 6666. A dialog from Duran if this occurs will happen, to notify you you've got the toughest Duran shape-shifter to beat.
- TIPS: While this starts out as a 1 on 1 battle, Duran will periodically summon his own controlled Zerg to attack you, even some Hybrids later on in the fight. To even up the playing field, don't hesitate to use your own Drop Pod elite units or the Leviathan. Drop Pod units work a bit nicer here for max damage to Duran or his units, especially the Torrasques/Hunter Killers. However, Leviathan has a powerful nuke attack that is lovely and incredible amounts of HP to survive. It can also spawn aerial units to help out but don't rely on them too much. You can use Apocalpyse here, but it will drain far too much of Kerrigan's energy to be useful. Mend mend mend is your best friend. Keep that health up, especially if going for the Hard achievement. Razor Swarm can work on Duran, but is more useful on the drop pod units. Other than that, keep moving, attacking, and healing, and he will go down.
- WINGS OF LIBERTY CONNECTIONS - There are three links here within the mission that setup Wings of Liberty.
- First - The Keystone is seen with all pieces within Duran's grasp at the start. We see Duran/Narud contemplating its use, and the modification and corruption done to one of its pieces (the piece found at Mar Sara). This modification by Duran is what allowed him to transfer the energy to open a doorway to the Void to allow Amon to return to the physical universe. At the end of the mission, Duran realizes that since Kerrigan now knows of the Keystone and its power, as well as what he planned to do with it, it is too dangerous to keep it fully intact with him now. If Kerrigan gets her hands on it, all his plans to revive Amon will be lost. Instead a new plan is hatched to manipulate Raynor's Raiders as the new army to use against Kerrigan's Swarm and will use the Keystone against her with the promise of turning her back into being human. To avoid suspicion, Duran separates the pieces again and distributes them to the Tal'darim to far corners of the galaxy and tells them it is for their "protection". He tells nothing of the impending Terrans that will come to collect them soon. Nyon, at this point, has failed him too many times and is but a pawn. Meanwhile, he secretly has the 5th piece buried on Mar Sara near where Raynor is known to be and tips the Dominion to its whereabouts, knowing Valerian's curiosity would order some Dominion soldiers to jump at the opportunity. This will be the catalyst to start Raynor's journey...
- Second - The ghost of Tassadar is first experienced by Kerrigan, the real form being of course the Xel'naga Ouros. Trying to take the form of someone that she would not only believe would come back but someone that she respected as the Queen of Blades, he thought he could convince her to abandon her foolish quest to take out Duran and travel to Ulaan where he carefully laid out his prophecy to put her on her path to defeat Amon. While he makes a convincing argument, it is not enough to deter her. However, when she becomes overwhelmed by the vision of Amon at the conclusion of the mission, she decides to take ghost Tassadar's mention of Ulaan up for consideration and decides this would be her next destination in order to learn more about this unseen enemy that threatens her and her Swarm. On the Leviathan end scene Kerrigan is much more somber than she usually is, this is because she was deeply disturbed by what she saw. An enemy finally has gotten the better of her and she now believes the end is nigh. Fast forward to the Zeratul/Kerrigan movie cutscene in Wings of Liberty as well as throughout the mission "Whispers of Doom", and Kerrigan is extremely pessimistic to Zeratul, stating that he "cannot outrun the doom that awaits us all" or to herself that "The end comes...and when it finds me...I shall embrace it at last". This is again due to what she experienced fighting Duran, and finally understanding what is coming for them all - Amon. The Hybrids are one thing, but the Xel'naga that created the Zerg and seeks to control them to his will with endless power, is another.
- Third - The discussion between Ouros and Amon in the beginning showcases that although both Xel'naga are "trapped" in the Void, Amon has mastered his surroundings and has gained full control of the Void. To that end, he has actually imprisoned Ouros to that he cannot stop Amon from his vantage point, only helplessly gaze. Ouros, however, has learned that his race Humanity has grown into the psionic potential he knew it could become and the vision he implanted to the Overmind worked. It infested one powerful psionic human to be its agent. This individual had the necessary components to become a new xel'naga, and eventually defeat Amon. With Amon only focused on the destruction of the Protoss (corruption of the Protoss via the Khala link was not conceived by Amon until LOTV), and the control of the Zerg, it found little use of the encroaching evolution of the humans, believing them to simply be a product of a failed Cycle. Ouros, from his prison, had been subtly influencing events overtime, but Amon has become wise to this. Amon has prevented Ouros from doing this almost entirely, but Ouros will attempt this trick once more, when he finds Zeatul has arrived at Ulaan himself in the final epilogue mission. Perhaps if Kerrigan would not listen to him, this Protoss might.
Epilogue03 - A Fated Path
- Race: Protoss
- Hero Available: Zeratul
- In this final mission, you are in control of the Dark Templar Zeratul. There are three parts to this mission, a solo crawl mission with only Zeratul, then when you meet up with the main Protoss base with Eredas, you must both play defense survival until Eredas can activate 4 power zones, then finally a final climatic battle against Duran/Narud, but vastly different than the previous battle you had with Kerrigan.
- To begin, Zeratul has remotely landed his Void Seeker deep within one of the caverns on the surface of Ulaan. (Fun Tidbit - The Void Seeker lands exactly in the same position you see at the end of Whispers of Doom in Wings of Liberty). He himself lands at the top surface of Ulaan, which is a craggy exterior with howling winds and a mostly inhospitable area. As he moves he will find ancient Xel'naga security constructs with a medium damage beam attack, but aren't too difficult to take out, especially if he has his master attack Shadow Blade or Fury Blade. These constructs have detector onboard so Zeratul can't hide.
- Swing up the right side hill and Blink over to the left side (if you don't have Shadow Walk for whatever reason it will be automatically given to you here). Approach the temple beacon as this will activate a light bridge across the chasm to the north.
- Crossing the bridge, your next challenge area various Xel'naga towers standing silently in an area. You may remember these from multi-player games. However this time, if Zeratul accidentally walks or blinks too close to them and they activate, this will sound an alarm, and more Xel'naga constructs will warp in to attack Zeratul. In addition Zeratul will take 50 damage per activation, so it is in your best interest to avoid walking too close. You can try and blink north as fast as possible if you don't want to tip toe around these and get to the next area and just deal with whatever damage you take.
- Next up you will enter a small open room that immediately will lock behind you with unknown energy. In order to unlock the energy barrier in front of you, you need to press the 6 "rocks" on the left or right side in the proper order. You will know they are the right order because when Zeratul steps on 1 a tone will sound and a Xel'naga rune will appear. If it is the wrong order, more Xel'naga security constructs will appear to attack him. Although Zeratul will not take damage like the previous challenge, he has no where to blink away to for safety and must fight them.
- Once the door is opened, the final challenge awaits, a Xel'naga Guardian construct. It is defending its prized asset - an Ihan Crystal. This happens to be the same Ihan Crystal Zertaul imbues with his memories of his journey starting with meeting Kerrigan later here on Ulaan. However, it is protected by an energy shield. You must defeat the Guardian before it can be retrieved. The Guardian is very tough, so ensure Zeratul is at full health/shields before taking him on. If you have Dark Shadow, your clone is super helpful here. Void Armor if you did A canon should activate here to take a beating from him. The Guardian can nuke Zeratul, so you need to be prepared to take those hits. If you have Master Shadow Walk, use the 2 second "immunity" Blink where you are completely undetectable to run away and restore some shields/health before the Guardian runs after you. Void Prison and Mind Control cannot be used on him, but your master blade abilities can, so nuke him right back. Hopefully you've fully leveled up Zeratul, otherwise you may have a tough time
- Once defeated, the Ihan crystal is yours! Zeratul will crawl down the mountain to the side where he will meet up with an old friend - Eredas. The fallen templar turned Immortal has been given his own squad to hunt down Kerrigan after he and his commander, High Templar Karass, had tracked her to coming to Ulaan not long ago. While Karass had already gone deep underground with his force, Eredas remained on the surface to weed out zerg that may be there. And of course, the Zerg come pouring out of a nearby large cavern entrance at mission start.
- Your goal is to bring Eredas himself to four "power" zones where he needs to "unlock" them to break the shielding up north to allow Zeratul to slip in to find the prophecy. It is a linear path north to bring Eredas to each zone, however, there are Xel'naga constructs guarding the areas, so ensure you can take them out before bringing Eredas there. The Zerg attacks start off timid and start ramping up the longer you hold your first base. Every 2 minutes launches a wave and every 10 minutes, the waves will begin to add new Zerg units to attack you, with additional units from the previous Zerg types. This continues a maximum of 4 times, or if you hold a base for 40 game minutes, you will have the maximum Zerg wave compositions against you, which consist of just about every Zerg attack unit, including a Brutalisk at the end!
- When you bring Eredas to a power zone, you will lose control of him as he powers it up. If Eredas dies, you obviously lose. Note that once Eredas is doing his thing, it cannot be cancelled, so be sure you can defend Eredas properly when he is activating them. It takes 10 minutes for Eredas to power 1 area, and there are 4 designated by an in-ground circular rune area. Hence, if you were to take Eredas to all 4, you will face the strongest Zerg spawn opposition against you, so you need one hell of a defense at the bottom base.
- If you feel you can't hold the base, and need to move north, there are plenty of mineral/vespene patches to take advantage of. Construct a new defense, but beware that the Zerg spawns will resume shortly after, but have been "reset". Meaning, if you were at a "Tier-3" Zerg spawn at the first base, and you lose it, the Zerg will start over at a "Tier-1" Zerg Spawn, and ramp up accordingly. You will also have to deal with standard Zerg waves as they begin to construct a base in your original base. This continues for power areas 2/3/4. If you can't hold an area, the Zerg will take it over and re-launch waves at you.
- Don't hold back on defenses here! So build pylons/photon cannons/khaydarin turrets if you have them quickly. Nerazim Shield Batteries if you have them can also be a good strategy near Eredas if you need to keep him alive if you find he dies too easily. Remember, Eredas has "Hardened Shields" and they are only good if he has Shields to use.
- Once ready to proceed to a new power zone, note there are a mix of Xel'naga constructs of the smaller "security" drones and the larger "guardian" types, but this time, Zeratul doesn't have to solo them. Be warned if you move Eredas up by himself, however, as they can cause some devastating damage to a solo unit.
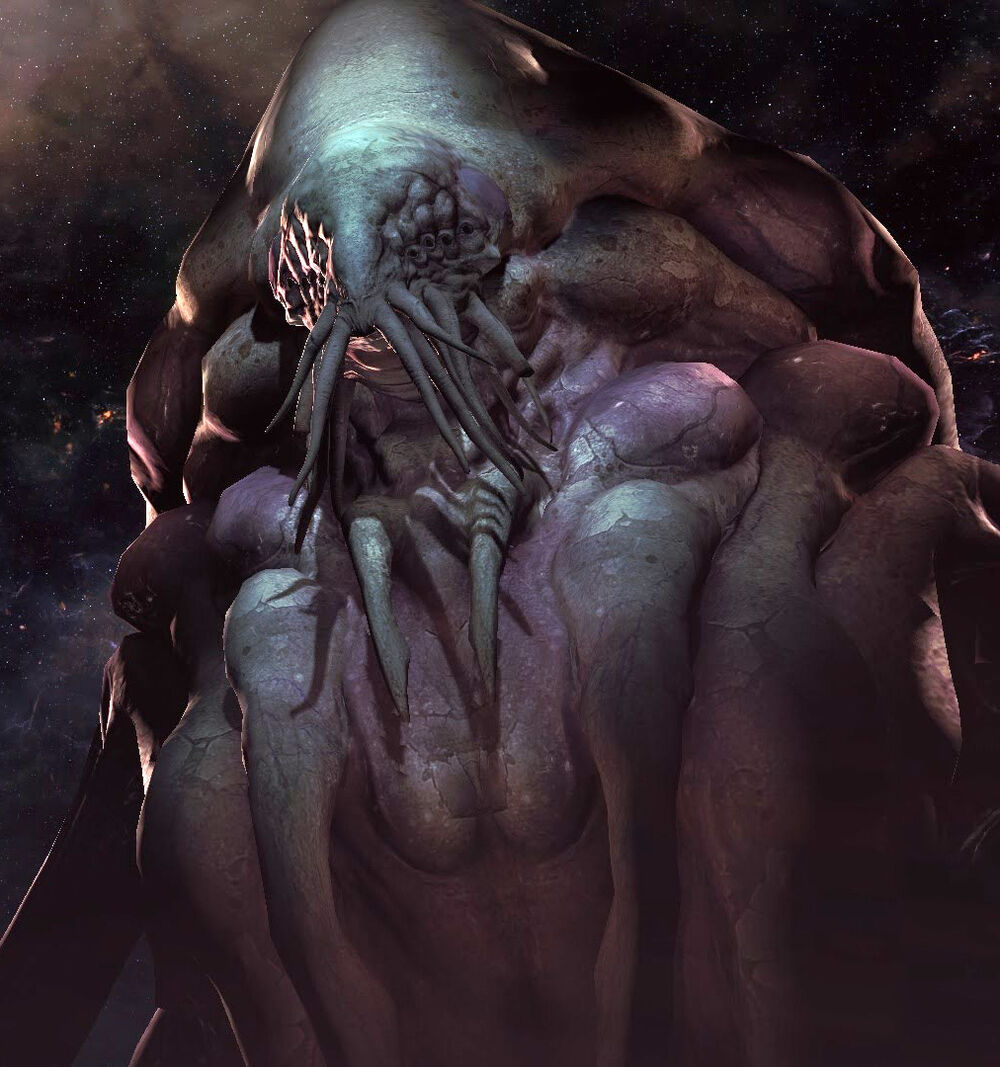
- After all 4 are activated, a cutscene will ensue. The barrier is unlocked, and just as all seems well, a lone Terran comes by - Emil Narud. Having been warned of these "prophecies" by Amon earlier, he has come to put a stop to Ouros' plans. Zeratul immediately detects his presence to be that of the same creature he saw on the unnamed ice moon that was creating the Hybrid - Samir Duran. Congratulating him on coming so far, Narud has come to relieve Zeratul of his mission and end the prophecy. Zeratul tries to slice Narud, but he unleashes his Xel'naga form, and obliterates the remaining Zerg and Protoss on the surface. Channeling the Void, Narud unleashes his Void Form right over the entrance to the prophecy caverns below (where we saw Kerrigan before, and where the FMV cinematic takes place). However, Zeratul informs him this is only an illusion. This is true, as the Xel'Naga form can't be attacked. But it can attack you!
- Duran's Xel'naga form max HP will be dependent on your difficulty, but also, if you have leveled Zeratul to his max (Level 10) and are playing on hard, he will gain a secret boost in health to a maximum of 9999 HP. A dialog from Duran if this occurs will happen, to notify you you've got the toughest Duran Xel'naga to beat.
- TIPS: Duran's invulnerable Xel'naga form has a nasty beam attack that will deal damage per second, so RUN AWAY when it fires at you! The goal is to instead take out the terran form of "Narud" form nearby. Striking it head-on won't work, as the regeneration is too strong. You need to destroy the four "Void Rift" structures sending phantom Terran/Zerg/Protoss units to attack you first. Once all four are destroyed, Narud becomes weakened, and you have about 14 seconds of uninterrupted attacks. A target will appear over Narud indicating he is ready to attack. After 14 seconds, he can't be hurt again until you re-destroy the Void structures. So its rinse/repeat as long as you can!
- Depending on difficulty, the final boss here may have only a few thousand or several thousand health points to get through. As you need to deal max damage in the 14 second opening window, your master Blade attacks are a must. Eredas needs to use Shadow Cannon. Both will take out nearly 1000 HP in a single round. Any surviving units you have can also help but chances are it will be down to just Zeratul and Eredas fighting.
- Zeratul's Shadow Clone should be saved here if you have it for max damage there. Void Armor can be used here to weather attacks from other sources while you attack.
- The Void Rifts unleash almost every ground type unit from all 3 races every so often. They are like Shadow Clones, 200% damage taken, 50% damage output, but if you fail to take them out, they can really multiply! Void Rifts have a small chance to summon a powerful air unit from each race. Since Zeratul/Eredas cannot attack air natively, you have two options when you deal with this: Zeratul can Mind Control it and act as its anti-air attacker or Eredas can Shadow Cannon it.
- Zeratul is going to get hit hard with attacks. In order to survive, you will need to have leveled up his "blink" (shadow walk) as well as his Cloaking abilities to max level. This will allow him to forcefully regenerate health without fear of attacks for 3 seconds while he can't be detected. While in this state, your max Cloaking will regenerate shields rapidly. Once 3 seconds are up, he is detected and can be attacked, but those 3 seconds are incredibly important to keep Zeratul alive. So whenever Blink is available, USE IT!
- When ready to attack Narud, be sure either your Shadow Blade or Shadow Fury abilities are ready. Shadow Blade will deal a single powerful nuke damage whereas Shadow Fury will deal moderate damage multiple times (omnislash!). Be wary of Shadow Fury accidentally targeting nearby enemies. You may wish to clear the area around Narud first before destroying all the rifts so you can have uninterrupted attacks only on him
- Watch out for a plethora of nasty attacks from the Xel'Naga, including energy blasts, fire attacks, you name it. As the goal is to take out the Void structures, that needs to be your goal. You may wish to have Eredas tank the units that come out while Zeratul focuses on the void structures. The units that come out are endless, so it is in your best interest to destroy them quickly!
- To make matters worse, on Normal/Hard difficulty, Void Thrasers will be summoned also periodically around the map. Unlike the other enemies, these guys do full damage with their special attacks! Take them out!
- Goodluck! This final boss was designed to the be the hardest.
- Once Narud's form is defeated, he will revert to his human form. He will gasp but have the last laugh stating Zeratul doesn't know what's coming, yadda yadda yadda, but then kill Eredas with a blast. Zeratul tries to stop Narud, but he is then warped away. As the area grows silent, with all Protoss/Zerg having been destroyed, Zeratul is left alone once more in the howling winds. Vowing vengeance for this cowardly act, Zeratul promises to seek answers to stop Duran and whatever darkness is coming, and descends into the mountain. A very familiar video then plays out before the final end scene and credits.
- WINGS OF LIBERTY CONNECTIONS - There are three links here within the mission that setup Wings of Liberty.
- First - How Zeratul comes to learn of the location of Ulaan was never really mentioned in Wings of Liberty, nor was it really mentioned in the canon books. I also didn't want to go too far into it even in this campaign, because it wasn't very noteworthy. However, the basic facts go > Zamara from Episode 3 told Zeratul about Pegasus and the active Xel'naga temple there > When Zeratul gets there a weird energy creature opens a wormhole, joined by hundreds more > When he goes through he is transported to an entirely new planet (not Ulaan) that contains a star map AND a legend (likely written by another species with rumors planted from Ouros) about the tablets containing the prophecy (which WAS written by Ouros) on Ulaan. It is here that Zeratul gets the coordinates and path to get to Ulaan. Yeah that's all canon more or less...not convoluted at all :) There is a brief cutscene in the start of the mission you can have with one of the Energy Beings who grants Zeratul some knowledge of the future, but states it cannot interfere with his destiny. Just some context from the book->game.
- Second - Before anyone cries out, Zeratul was alone first before he bumped into Karass! Was he really though? Re-reading the script from Whispers of Doom, both when the Stalkers joined him and even when he found Karass, Zeratul wasn't the least surprised. He just said "Yup, cool, lets go", which may tell us he was well aware of them being there. To that end, I had his first encounter be with Eredas commanding his own legion at the surface fighting zerg there while Karass fought zerg below. There the first reunion took place. It is also a nice nod back to Episode II and completes Eredas' story with his final sacrifice. I also always found it funny about Zeratul's comment about Banelings and acid in WOL "Whispers of Doom", like how did you know bro? You were isolated forever without zerg, then you went on a solo mission without zerg. Your first encounter back with zerg was now. So you never saw Banelings till now. So him fighting zerg on the surface would allow him to make this comment since he first attacked banelings there (I threw in a quote from Eredas about Banelings too to make this point).
- Third - Obviously the most powerful connection here is the immediate FMV video at the end from Zeratul making his way down from the surface to the temple and then finding Kerrigan. As for the Ihan Crystal, t is important to note, that the Ihan crystal is completely unimportant to the entire plot of Starcraft 2, whether Raynor uses it or not, doesn't change the outcome of Wings of Liberty. Kerrigan will always become de-infested, Narud sees to that. The only change is whether Raynor knows what a Hybrid is for the secret mission. As for the final battle, besides REALLY wanting a final battle here, you have to figure Amon has been knowing Ouros has been plotting against him, which was seen in the last mission, and finally in Mission 3, he gets wind of these "prophecies". He then sends Narud to destroy them. It is a fun concept to think Narud was THIS close to causing a complete cave-in destruction if Eredas/Zeratul didn't stop him, potentially causing a major timeline disruption to Wings of Liberty and SC2. Zeratul by WOL, knows only 2 things, that Duran is Narud (he confirms this by LOTV, even though in WOL/HOTS he has no interactions with either, so we assume he found out somehow, why not this), and that Hybrids are real and there is a Xel'naga connection to Duran. Thus, he makes the comment that the Xel'naga are returning, but do they destroy or save? With Amon and Ouros...they technically do both. His interactions with Kerrigan at the FMV video suggest she is extremely depleted in hope after what she found with Duran. While Zeratul doesn't give up, he presses on to find the prophecies. After the remaining Protoss are defeated by Kerrigan, a final in-game cutscene shows Kerrigan finding an additional prophecy, designed only for the Queen of Blades, showing how Amon will be released - The Keystone. She knows what she must do now - Launch a galaxy wide invasion to find the Keystone pieces which she knows Duran hid from her. She begins with the latest rumor of one piece at Mar Sara, and orders her Swarm there. This lines up with when the Zerg attack the area after Raynor secures 1 artifact, in Mission03 in WOL. Meanwhile, Zeratul has already left to find the Preservers. And thus, ends Enslavers Redux and the history before WOL takes place.
-
View User Profile
-
Send Message
Posted Apr 18, 2020You perfected yourself doing this whole campaign and filling in the story gaps, I love you man <3